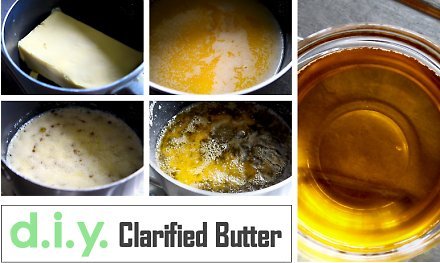
Butter — glorious butter. Unless you live in my neck of the woods, you should have no problem getting your hands on some. But what if the recipe calls for “clarified” butter? Most probably it involves frying. You can fry with regular butter, sure, but be prepared for it to burn (from the milk solids in it). The food will be edible, just not presentable.
Why use clarified butter at all? If it were up to me, I’ll take peanut oil every time. But butter makes a dish so much richer, more unctuous (which is why I’m disinclined to use it in omelette/scrambled eggs — rich enough to start with). Clarifying helps to increase its smoke point while keeping its unique mouthfeel . It is especially useful in vegetarian dishes, making it a staple in Indian cuisine, where it is called ghee.
The good news is that it is very easy to make clarified butter at home. For the first installment in our DIY series, that is what I’m going to show you. Then we are going to use it in a dish that really benefits from its richness. But that’s for the next post. In the meantime, get cracking.
Clarified Butter

- Equipment:
- Saucepan
- Mesh strainer
- 250 grams butter
Ingredient:
- If your butter is at room temperature, place it in the freezer until semi-frozen; this will save you a lot of mess. Remove butter from its packaging and put into saucepan over medium heat until completely melted.
- As the butter heats up, the milk solids will start to separate, some rising to the top while the rest settle at the bottom. Bring the liquid to a simmer and turn heat to low.
- As the liquid continues to simmer, more foam will rise to the top (salted butter foams more than unsalted). Using a fine strainer (metal, not plastic!) scoop out as much of the foam as you can, remove to a bowl, and save for future use (like with fried rice).
- Let the clarified butter simmer for a few more minutes until all moisture (water) has evaporated and the solids at the bottom of the pan turn toasty to infuse the oil with a nutty flavor. Let it cool completely before straining into a glass container.
- Clarified butter keeps well at room temp, but it can also be stored in the refrigerator until using. In the latter case, the liquid will turn opaque and solidify, but it will not affect quality.


This post has no comments.
Post a Comment